
I started with the boxes and gave them a good sanding. The flowers they had painted on them was with glitter glue so I had to make sure all of that was gone and smooth. If you paint over words or paintings you will see the image come through if you don't sand them smooth. The paint that was on them was a wall paint and came off in pellet form, makes me appreciate DIY Paint even more.

The boxes were handmade and not built very well but the wood they used was great. They are sturdy and somewhat square and will work for my projects. The price was the best part.

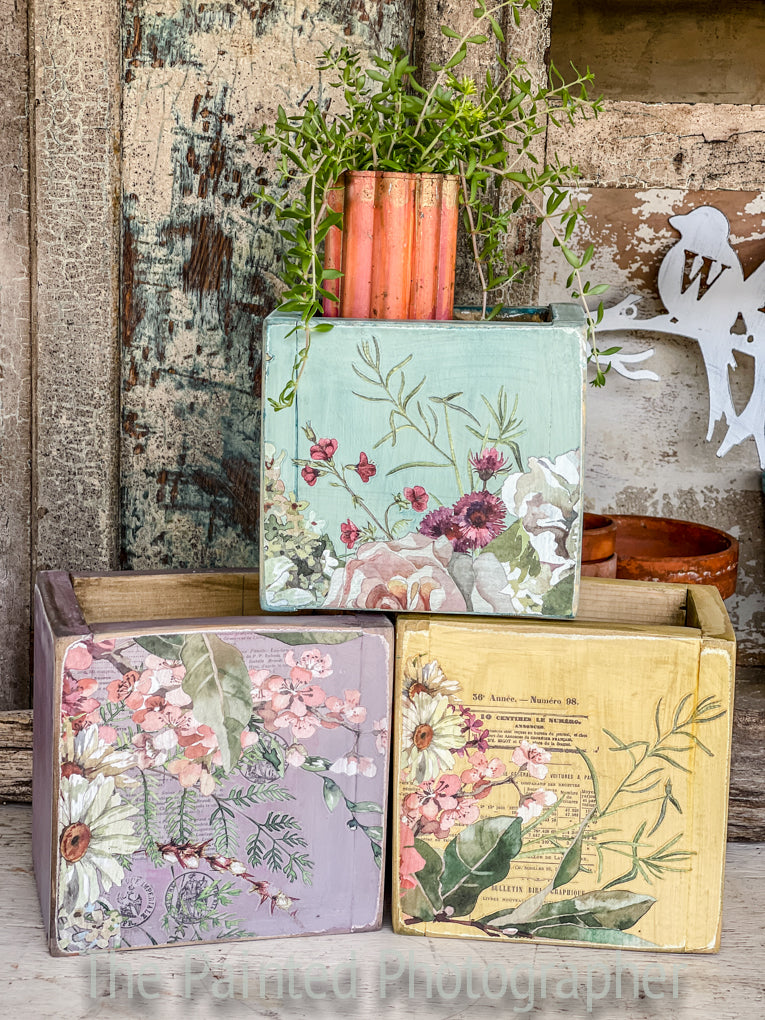
I chose 3 different colors from DIY Paint for each box, I wanted colors that would complement the IOD Transfer Elysium. The Elysium transfer is a 12x16" pad with 4 sheets of beautiful water color like florals. The flowers have some unique line work to them and text in the back for more depth. The Elysium transfer is priced lower due to the 4 sheets which makes it very affordable for those crafter working on smaller projects. The total cost for the transfer is $32 and with these small boxes I can use 1/2 of a sheet bringing that cost down to $4 a box. Pretty good price point for me.

I started with DIY Cake Batter, the DIY Paint is thicker than most paints and made with 9 ingredients making it highly pigmented. Cake Batter is a soft yellow that I've grown to love a lot. The DIY Paint is also the perfect combination with the New DIY Brushes. This brush is called "The Little Dipper" which is great for fitting in the sample size jar of paint and small projects.

It was a beautiful day in Wisconsin so I took advantage of the outdoors and painted all 3 boxes outside. The clay based paint dries lighter as you can see in the photo but when sealed it will brighten back up again. It dries very quickly and even more quickly outside.

All 3 wood boxes and the metal box are painted and distressed. I distressed the wood boxes with a sander to get down to the bare wood and some of the white peeking through. The metal box I used a baby wipe and wet distressed down to the metal. DIY Paint can be removed with water which is one of the benefits. The wet distress makes a more natural looking distress as you can see in the teal metal box. The colors I used are Apothecary, Old 57, Cake Batter and French Millinery.

I had these boxes sitting in the sun while I tended to some garden work which made sure the paint was cured thoroughly and I also made sure all the sanding dust was removed from the surface. With this method I could add the Elysium transfer without sealing my paint. If you're going to use this method, make sure it's very dry and clean or you'll have troubles with the transfer not adhering.
Because the boxes were small I could get by with 1/2 of one sheet, making sure I cut the transfer as wide as the front of the box and as tall as I wanted it. Also since there is text in the back make sure the text is upright as the 2 sheets have flowers hanging from the top vs growing up.

On the back side of this box I added the little bits of the greenery hanging from the top. I love this look.

I don't know why I wanted so long to use this transfer, it's amazing. If you haven't grabbed yours yet you should. I might have to find a larger project to use them on. Every color I picked looks amazing, it's like IOD used DIY colors within the design. Grab yours here.

Next I used DIY Making Powder on the boxes for a bit more depth. This is a trick I got from Debi Beard while using DIY Paint it's made from clay and the clay absorbs the making powder when mixed with water. The Transfer will repeal the water. Making it perfect for adding before you seal your projects.

Here is the look after I applied the Making Powder, it very subtle but still makes a huge difference in the depth.

Let's give you a few closeups.


I sealed up the project with DIY Dark and Decrepit on the edges with the bare wood giving them some color and also in the inside of the boxes. Then I came back using DIY Big Top Clear Sealer to set the entire project. Be careful when using a Sealer and Making Powders together it will smear if you don't use a very light touch for your first coat of sealer. Now aren't those .97 cent boxes looking like beautiful home decor?

For the teal Old 57 metal box I used DIY Paint in Old 57 (my favorite), the Smoothie Brush and the Seed Catalogue Transfers.

I had to cut the bottom wording off but that is the beauty of transfers is you can cut them for whatever works for your look or project.

For the long sign I used a sheet of JRV Decoupage Papers, Summer Flower Garden, to keep the floral look going. I applied the paper using DIY Crystal Clear Liquid Patina which is like Mod-Podge on Steroids.

Here is a tip for using decoupage paper when smoothing it out. It can tear very easily when wet so I used the plastic sheet from the transfer to put my hand inside and used that to smooth the paper and remove any wrinkles and bubbles.

That was a perfect day of crafting and turning thrifted items into home decor. I hope you enjoyed my walk through of the process and you'll try the product some time. If you are interested in anything shown here today visit my website click here or if you're local visit Medford Fourmens Farm Home where DIY and IOD Products are sold.

I love to hear from you, please comment with your favorite project and if you're ready to try DIY Paint or IOD Transfers.
Until next time.......... Happy Painting
4 comments
Enjoy following you as you create. Always so refreshing
I wrote a comment on you FB post. Just love all of this. Would be really cute set up at your garden tour. All of it! I can tell you one thing I sure would buy it and it is so fresh and awesome! And of course Wilson would not have to ship it LOL!
Love your stuff.
Love the transformation of the boxes! Favorite for me is the cake batter one. Long live our DIYQueen! 💖